Home Canning Using A Steam Pressure Canner
Home canning using a steam pressure canner, processes foods as it destroys botulism. Low acid foods such as beans, peas, corn, asparagus,beets, greens, mushrooms, potatoes, meats, seafood, and squash, must all be processed in a steam pressure canner. It is the growth of the bacteria Clostridium Botulinum in canned food which causes the deadly form of food poisoning called botulism.
These bacteria spores which are comparable to plant seeds, can survive harmlessly in soil or water for many years. When ideal conditions exist for growth, the spoors produce vegetable cells which multiply rapidly and can produce a deadly toxin within 2-4 days of growth in an environment containing a moist low acid food, a temperature between 40-120 degrees Fahrenheit, and less than 2% oxygen. In other words, canned food is the perfect environment for botulism to grow. Botulism spoors are on all fresh food, but because they need an oxygen free environment they are harmless.

Most bacteria, yeasts, and molds are difficult to remove from food surfaces, and washing removes them only slightly. The home canning processing times recommended in most recipes ensure the destruction of the largest number of heat-resistant microorganisms in home canned foods. Properly sterilized home canning, will free food from spoilage, if lids are properly sealed, and items are stored below 95 degrees Fahrenheit. Storing jars at 50-75 degrees Fahrenheit, enhances retention of quality.

Steam Pressure Method
The steam pressure method of home canning processes foods under pressure at a temperature of 240 degrees. A steam pressure canner is required for low acid foods. It supplies the intense heat needed for the destruction of botulism bacteria.
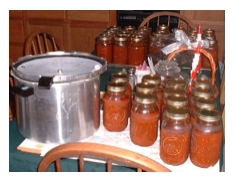
A steam pressure canner consists of a heavy kettle with a rack. It also has a cover that can be clamped or locked down to make the kettle steam tight. The cover is fitted with a safety valve and a vent or petcock that can be opened or closed to allow steam to escape or to trap it. Also on the top is a pressure gauge that indicates pressure during processing.
Consider Your Altitude
One thing that is important to remember and to take into consideration when canning is your altitude. If you live above 1000 feet you must adjust your processing times accordingly. Failure to lengthen the processing times may result in short term shelf life, or spoiled food due to the growth of mold and bacteria and other microorganisms not detected by sight or smell. Food poisoning may ressult if the spoiled food is eaten. See the chart below for guidelines.

A word of caution, do not let yourself become distracted when using a pressure canner. You must watch them carefully to avoid accidents. Monitor the pressure gauge, and maintain a constant pressure while processing. One or two pounds either way is not critical, but any sudden loss of pressure or too much pressure can cause problems with the process.
Using Pressure Canners
1. Put 2-3 inches of hot water in the canner. Placed filled jars on the rack, using a jar lifter. Fasten the canner lid
securely.
2. Leave weight(the piece that goes on top of the vent port) off or open petcock. Heat at the highest setting until steam flows from the petcock or vent port.
As soon as the steam appears, set your timer for 10 minutes. At the end of the ten minutes put the weight on or close the petcock.
3. Maintain the high heat setting until the canner reaches the desired pressure.
4. Start timing when required pressure is reached. Always use a timer do not try to depend on your memory because timing is critical to the operation.
5. Reduce heat when pressure is reached (you may have to adjust heat occasionally to maintain Pressure). Sudden and
large pressure variations during processing may cause unnecessary liquid losses from the jars. Some weighted gauges
should jiggle every 2-3 times per minute. Others should rock slowly throughout processing. Please refer to the manufacturers guide.
6. When the timing is done remove the canner from the heat source. Do not run cold water over the canner to cool it. Forced cooling can cause food spoilage. Newer canners have a vent lock that drops when the canner is depressurized.

7. Once the pressure is relieved, remove the weight from the vent port or open the petcock. Wait 2 minutes then remove the lid. Lift the lid away from you to prevent steam burns.
8. Remove jars with a jar lifter and place them on racks or cookie sheets to cool. Make sure that there is space between the jars for air circulation. Do not tighten rings after processing jars.

9. Allow the jars to cool over night. As they cool you will hear the lids popping. This is a good sign, as it means the jars are sealing. The contents of the jars may continue boiling for a long time after removing them from the canner do not worry, as this is also normal.
10. The next day, check all of the jars and make sure they are sealed. Lids should be concave, and not give when you press on them. If a jar has not sealed, reprocess the product using a new sealed lid. Never reuse lids. Label all jars with the contents and the use by date. (1 year from the date of canning). This will help you to keep track of your stock.
Home canning can be a fun and useful activity for the whole family. You can produce high quality food that you will find useful in providing your family with a safe, nutritional diet.
Watch the video below to learn more about pressure canning.
A Few Good Pressure Canning Recipes
Field Peas
Shell and sort peas. place in kettle with enough water to cover. Bring to a boil and simmer for 5 minutes. Fill hot jars with peas and water. Slip a spatula around the inside of jar to remove air bubble. Seal and process for 40 minutes at 10 lbs pressure.
Chicken Stock
1 4-5 lb stewing chicken
4 sm carrots
2 whole stalks celery
2 tsp salt
1 bay leaf
2 med onions whole
Put cut up chicken, vegetables and seasoning in large kettle. Cover with water and bring to a boil. Simmer until the meat falls from the bone. Pour through a colander to separate stock from meat and vegetables. Cool stock in refrigerator over night.
The next day skim off fat. Brng to a boil and then pour into hot jars. Seal and process for 45 minutes at 10 lbs pressure.
Marinara Sauce
1 quart whole tomatoes
1 quart tomato sauce
1 quart crushed tomatoes
1 pt tomato paste
2 tbsp dried basil
2 tbsp dried oregano
4 gloves garlic minced
2 tbsp olive oil
Saute garlic and spices in olive oil until garlic is golden. Take care not to burn the garlic. Add tomatoes, sauce, and paste. If needed add 1 qt water. Simmer on low heat for 30 minutes. Pour into hot jars, seal and process for 30 minutes at 15 lbs pressure.
For more great recipes click on the link below.
Click hereTo Purchase Home Canning Recipes EBook
Click here to return to the Home Canning Page
